

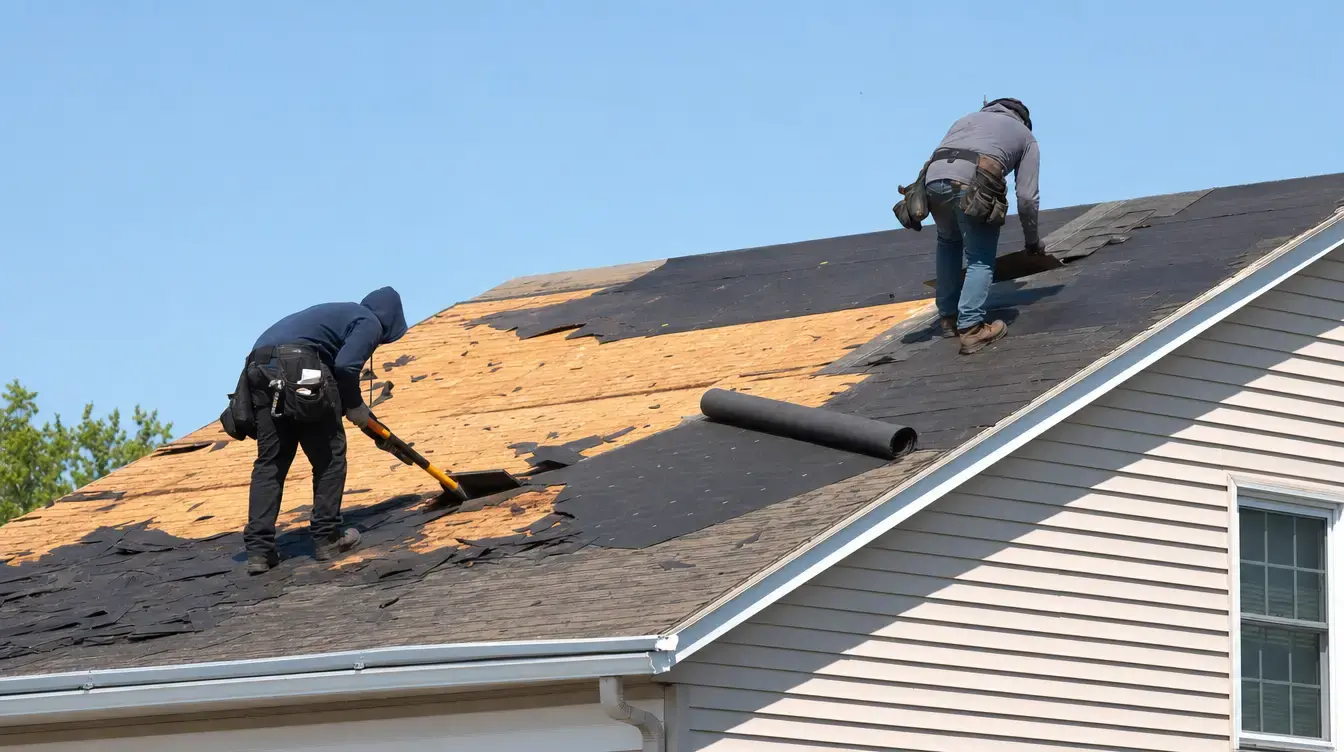
A roof replacement usually takes one to two days on a typical home and follows a clear set of steps. It starts with a free on-site inspection and written estimate, then material selection, scheduling, tear-off of the old roof, deck repair, the new system install, a full cleanup, and a final walkthrough with your warranty paperwork. Most of the work happens fast once the crew arrives, so the planning you do up front is what makes the day go smoothly.
Replacing a roof is one of the bigger projects a homeowner takes on, and not knowing the steps is what makes it stressful. The good news is the process is the same on almost every job. Once you know the order things happen in, you can plan around it and ask better questions. Here is exactly how CER Roofing Contractors handles a residential replacement from start to finish.
The 10 steps of a roof replacement
- Free on-site inspection. A roofer walks the roof and checks the attic where possible, looking at shingles, flashing, valleys, vents, and any leak history.
- Written estimate. You get a ballpark price in writing based on square footage, pitch, material, and any repairs the deck may need.
- Material selection. You choose the shingle line, color, and any upgrades like better underlayment or ridge venting.
- Scheduling. The job goes on the calendar, with an eye on the weather window so the roof is never left open in the rain.
- Tear-off. The old roof is stripped down to the wood decking and hauled away.
- Decking inspection and repair. Any soft, rotted, or damaged plywood is replaced before anything new goes on.
- Installation. Underlayment, drip edge, flashing, shingles, and ridge cap go on in the right order, the way the manufacturer specs it.
- Cleanup. The yard is cleared of debris and a magnetic roller sweeps for stray nails.
- Final walkthrough. The crew lead walks the property with you to confirm everything looks right.
- Warranty paperwork. You get your manufacturer and workmanship warranty details in writing.
Step 1: The free inspection
Everything starts with a real look at the roof. A roofer checks the shingles for curling, cracking, granule loss, and missing pieces. They look at the flashing around chimneys and vents, since that is where a lot of leaks actually start. Where it is safe, they check the attic for water stains, daylight through the deck, and signs of moisture. This is also the moment to flag whether you need a full replacement or just a repair. CER is a HAAG Certified Inspector, which matters most when storm or hail damage might be involved and an insurance claim is on the table.
Step 2: Your written estimate
After the inspection you get a written estimate. Treat any number before an on-site look as a guess, not a quote. As a ballpark in this area, architectural asphalt shingles run about 5.50 to 8 dollars per square foot installed, and standing-seam metal runs about 10 to 16 dollars per square foot. A typical full replacement lands somewhere between 11,000 and 20,000 dollars, and a typical repair runs 500 to 1,800 dollars. Your real price depends on the size of the roof, how steep it is, the material you pick, and what the crew finds under the old shingles. The only way to get an exact figure is a free on-site inspection.
Step 3: Picking your materials
This is the fun part. Most homes go with architectural asphalt shingles because they look good, last a long time, and price out well. Some homeowners want 3-tab asphalt for a tighter budget, and others go with metal, tile, slate, or shake for the look and longer lifespan. Color matters more than people think, since the roof is a big part of the curb appeal, so take samples outside and look at them in real daylight against your siding.
- ▸Architectural asphalt: the popular all-rounder, good looks and good value.
- ▸3-tab asphalt: the budget-friendly classic.
- ▸Metal: long life and great in storms, standing-seam is the premium option.
- ▸Tile, slate, and shake: premium looks with the longest lifespans.
Step 4: Scheduling around the weather
Once the contract is signed, the job goes on the calendar. A good roofer watches the forecast closely, because the worst thing you can do is tear a roof open right before a storm. In North Carolina, spring and summer pop-up storms are real, so the crew plans the tear-off and dry-in to happen inside a safe window. You will get a heads-up on the start date and roughly how long it will take.
Step 5 and 6: Tear-off and the decking
On the day of the job, the crew strips the old roof down to the wood decking and loads the debris straight into a dumpster or trailer. With the old shingles gone, they can finally see the decking. This is the step you cannot skip. Any plywood that is soft, rotted, or water-damaged gets replaced, because new shingles over bad wood will fail early. If extra decking is needed beyond the estimate, a straight roofer tells you before they do the work, not after.
Step 7: The install
Now the new roof goes on, and order matters. Underlayment lays down first as a moisture barrier, then drip edge along the edges, then flashing in the valleys and around the chimney and vents. Shingles go on from the bottom up so each row laps over the one below, and ridge cap finishes the peak. Proper ventilation is part of this step too, since a hot, poorly vented attic shortens the life of any roof. Doing these layers right is exactly why certified, trained installation matters more than the brand name on the box.
A roof is a system, not just shingles. The underlayment, flashing, and ventilation decide how long the whole thing lasts.
Step 8 and 9: Cleanup and the walkthrough
Cleanup is where you can spot a careful contractor. The crew clears the yard of debris, hauls away the old material, and runs a magnetic roller across the lawn and driveway to pick up stray nails. Then the crew lead walks the property with you. You look at the finished roof together, talk through anything you noticed, and make sure the gutters and grounds are clean. This is your chance to ask questions while everyone is still on-site.
Step 10: Your warranty
Finally you get your warranty in writing. There are usually two layers. The manufacturer warranty covers the materials, and the workmanship warranty covers the installation. The exact terms depend on the product line and how the roof was installed, so read the paperwork and keep it somewhere safe. CER is GAF certified, which can open the door to stronger manufacturer coverage on qualifying systems. Ask about the specific terms that apply to your roof so you know exactly what is covered.
Why work with CER
CER Roofing Contractors has been replacing roofs since 2020, holds a 5.0-star rating across 85 Google reviews, and is A+ rated by the BBB. Based in Mt Ulla, the team serves Iredell and Rowan County, including Mooresville, Statesville, Salisbury, Troutman, Kannapolis, Lake Norman, and Winston-Salem. They are GAF, Atlas, and Sherwin-Williams certified, and there is a 250 dollar referral reward if you send a neighbor their way.
Call CER Roofing Contractors at (704) 902-6128 for a free on-site inspection and an honest, written estimate on your roof replacement.
Related CER services
CER Roofing Contractors, LLC
5.0-star rated (85 reviews), GAF & HAAG certified roofing across Iredell & Rowan County, NC since 2020.
(704) 902-6128